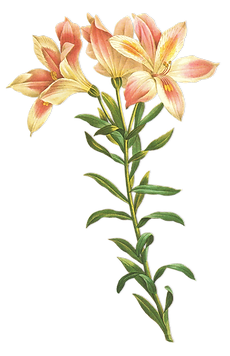
Just when I thought I had learned all that there is in card making...STOP the presses! There is so much more! Art is EVERYWHERE! Jaycee Gaspar once again amazed me with his incredible talents, research ability and brought a whole new level of card making with his class Transcending Tattoo Art. Not really a tattoo person, I was hesitant to take this class, but so GLAD I did!!! It was so inspiring! Jaycee broke down each lesson on how the art of tattooing can be applied to the art of card making. How cool is that!!! I can credit Jaycee for expanding my knowledge base of how the tattoo art form can transcend into card making! Of all his lessons, I was instantly drawn to the dotwork form of tattooing. Dotwork is the meticulous placement of dots to create intricate patterns when viewed from afar. To create this card the following Altenew Items were used:
Wallpaper Art Stamp Set
Crisp Blank Dye Ink
Lava Rock Dye Ink
Fine Point Pens
To create a card like this, you want to choose a floral image that offers enough white space on the petals so as to create your dot work. I am by no means an expert on shading effects but when placing your dots, it's best to put a higher concentration of dots on areas of shade and less dot work where light would. naturally shine on the petal. When I made this card, I just let loose and had so much fun just adding dots where it felt right! Artsy! See below for my video process.
The other tattoo art form I thought was really cool was the Old School Graphic Coloring. This is a skill that I still need a bit of work on, and looking forward to perfecting my craft! This type of tattoo art is what I kind of grew up with. Sailor Jack Style with Bold Black outlines and shaded coloring. The elderly men in my family would sport this type of tattoo on their arm as a symbol of pride. I just loved how Jaycee broke down the steps to create this tattoo! What I have learned the MOST out of this course is to let down my barriers of creativity and let my imagination flow! This style of art can be recycled to use on many of my future projects. This is what excites me most! By exploring various ways to create, I will begin to find my own style. To make this card, I used the following
Wallpaper Art Stamp Set
Beautiful Day Stamp Set
Frosty Pink Dye Ink and alcohol marker
Buttercream Dye Ink and alcohol marker
Frayed Leaf Dye Ink and alcohol marker
Jet Black Dye Ink
Using the black dye ink, you stamp your floral image on card stock. (use a stamp positioner) Then you take the black dye ink and apply the ink pad directly to the part of the floral image you want shaded. For this example I choose the center and a few leaf portions. After applying the black ink, I then took a blender brush and blended the black that was on the floral stamp. This will give the black ink a muted color. From there, you then add your color dye inks in the same fashion, but do not blend. You are left with a muted toned colored floral. To add interest, you then take the alcohol markers and add highlights with the three colors, blending each one out.
I fussy cut each floral out and added bits of leaves from the Beautiful Day Stamp Set. On my blank A2 Card Panel, I added splatters, arranged the florals and stamped my sentiment! Such a fun card to make! Until next time...hugs!

Absolutely gorgeous!