Hello Crafty Friends! It's been awhile since I posted because I have been SUPER BUSY creating awesome cards for my final challenge in the Level One AECP! You may want to grab a cup of coffee (or wine) as I have lots to teach you!
Here is the Challenge I received!
Create a His and Her set of a variety of cards (minimum set of 4 cards)
Each set had to be cohesive in theme/color.
Select any 3 components from Level One ( I used about 6! The Altenew Classes are superb)
Make your own card box packaging for your gift set.
Use a recycled item on either the cards or packaging.
Challenge accepted! Here is the set of cards I made for Her! And here is the link for the masculine set! https://www.thelittlecraftcorner.com/post/my-final-challenge-~-level-one-aecp~-masculine-cards
Right from the start I knew that I wanted a soft feminine look with purples, yellows and pinks! From all the Level One AECP classes I took , two classes stood out in particular which were celebration stencils and irresistible inking! I then added Laying One and Two technique classes using Altenew's Bearded Iris and Coneflower layering set.
These cards above prominently feature the following:
Celebration Stencil Techniques
Level One Layering and Level Two layering
Irresistible Ink Techniques
Card one features the beautiful Flower Bunch Stencil Set! This set features 4 stencils with easy to follow directions on how to layer each one. I used the inks of Lava Rock, Lavender Fields, Deep Iris and Forest Garden to create the flower.
TIP: Practice the layering on a scrap piece of paper first so you get the hang of where each layer sits. Adhere each stencil with repositionable tape so your stencil does not move. BE CAREFUL WHEN BLENDING! Trust me! It is so fun to blend the inks that you wind up getting ink all over your card! haha! just take your time and your project will be perfect!
After I was satisfied with my flower, I then cut the cardstock down to a 4 x 5.25 size and then added another layer of stenciling by using the fine tulle stencil and lava rock ink. I wanted to add ONE more layer, so I dry embossed cardstock with the Organic Linen Folder and adhered to my card panel. The Sentiment came from Coral Sunset Stamp Set. I really love the final look!
My next two cards feature the Moroccan Mosaic Die Cut along with the Bearded Iris Layering Stamp Set. Continuing to use the Lavender Color Swatches, I first created the flowers and die cut them out. Next I created the Moroccan Mosaic Die cut and cut it in two pieces so I could create two cards.
I adhered the Mosaic die cut onto purple cardstock (right side) and then adhered this panel onto an A2 card base. I ink blended a bit of lavender fields onto the corner of the card and stamped my sentiment from Altenew's Bergenia Builder Stamp Set. All that was left was to place the iris along with a bit of bling and now we have a terrific card to send!
The Left side image takes the die cut and directly adheres to the cardstock that was dry embossed using the Organic Linen Folder. I then added the iris and a sentiment from Label Love.
I enjoyed making this card so much that I then created it a third time, but added my first video!
My next greeting card's inspiration came from watching a card tutorial that focused on the CAS style. I began creating the stencil by using the negative portion of a square stencil. I wanted to create the soft look here, so I went with pinks and yellows. Again, the trick to ink blending is to go slow, blend in a circular direction, and adhere your mask down so as not to get ink on your card panel.
After the card was assembled using the coneflower, the floral lace die and sentiment, I felt it was missing something. (Lightbulb moment!) A bit more stencil layering would do the trick! So I then added a layer of lines with Mango Smoothie to the blended square and inked the card edges with puffy heart. I just love how the final card turned out! The sentiment was from a Gina K set I had previously owned.
So now I have 2 cards left. I tend to make blended backgrounds using watercolors and then put aside for future use. So today, I pulled out one of these previously made backgrounds and added more inks that were blended using the tulle stencil, and popped a layered flower with sentiment! Isn't it amazing?
TIP: Never throw out partially made projects as you may need them one day! A die cut can be used in so many ways! I only needed a part of the floral lace die (on the card above) so the other piece can be used for a future project!
To create this card, I cut a 3.5 x 4.75 piece of watercolor paper and randomly placed green and pink water coloring inks directly onto the watercolor paper. When fully dry, I then pulled out the tulle stencil and with a fine blender brush, added the extra shading of pinks and greens that I wanted to create the desired effect. I then stamped flowers and leaves from the Beautiful Day Stamp Set and added this to the card. To finish off, I stamped a sentiment with versa mark ink and heat embossed with white embossing powder.
My last card was super simple! I just used the Henna Square Stencil and used the same ink blends of pinks and yellows. I first put down my rectangle stencil and using the negative space, placed the Henna stencil onto the card and ink blended. This is a one layer card
This stencil is so gorgeous, that not much else needed to be added! I went with a two chipboard pieces from Enjoy the Ride collection and adhered them to the card! It was really that simple!
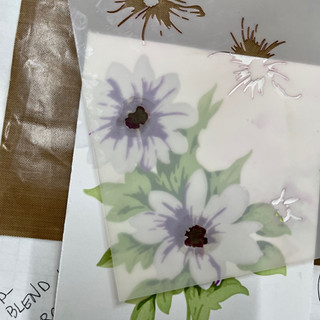
Now it was time to create the packaging using recycled materials. I found some old acetate card packaging in my drawer and used this as the box. From there, I scored cardstock to custom fit around my box.
Keeping in theme with the Masculine Set, I ink blended a strip of cardstock using the lavender inks and then adhered an extra Iris I had made along with the rest of the Floral Lace Die I had put aside! (keep those leftovers!) I added the twine and now we have a lovely set of cards to give as a gift! Hope you enjoyed learning some new techniques when making feminine cards! Hugs!
Here is what both sets look like!



































You have done an outstanding job on both the card sets. Bravo! You should be so proud of your creations! I love what you have done! Way to go!
Thank you for submitting your work to the AECP assignment gallery.
A lovely set, and I really like your masculine set too - well done!